Summary: In this blog, we’ll examine three distinct methods for installing Node.js and its package management on macOS. We’ll talk about installing Node.js and NPM on Windows and Mac native package installer, homebrewing, using a third-party installer, and using Node Version Manager to switch between Node.js versions.
Introduction
Node.js is a cross-platform framework that executes and runs JavaScript scripts outside the browser. Node.js has experienced tremendous growth in popularity among developers since its initial release. Web developers prefer it because it uses JavaScript. After all, it is quick to learn, simple to use, and has outstanding scalability. All major operating systems, including Windows, Ubuntu, and Mac, support the Node.js framework.
For JavaScript developers worldwide battling to elevate their code into a sustainable development environment, Node.js arrived as a blessing.
With Node.js, it is now possible to create web applications with two-way connections that allow seamless real-time data flow between the client and server. For programmers who intend to push real-time web apps using WebSocket, Node.js has undoubtedly been innovative.
What is Node.JS?
Node.js is an open-source execution environment for JavaScript that modifies the features and enhances the capability of the language. Thus, you can utilize JavaScript for front-end and back-end development, enabling full-stack JavaScript development.
The Node.js environment allows JavaScript to use the database directly and perform as a backend language as intended. As a result, Node.js allows you to eventually create and run programs using only JavaScript.
Node.js relies on an event-driven, non-blocking I/O architecture, and its main engine is the V8 JavaScript runtime engine. All of the components combined make up Node.js, which aids in achieving strong product performance. To check the performance of Node.JS you can hire node JS developers and get installed Node.JS on a mac
What is NPM?
The default package administrator for NodeJs is NPM or Node Package Manager. In essence, NodeJs is a JavaScript-based development environment that enables programmers to create scalable applications in a predetermined time.
Open-source web developers can share and borrow packages with NPM to create apps. Additionally, it functions as a command-line tool for the application to install Install Node.js and NPM on Windows and Mac packages in the project, manage dependencies, and even manage versions.
NPM’s Components
- Website: You may find packages for your project on the official NPM website. Additionally, you can build profiles and create them to handle and access all kinds of goods.
- Command Line Interface (CLI): The CLI runs from the terminal on your computer to interact with NPM modules and repositories.
- Registry: The registry has an extensive database of JavaScript apps and meta-data. As a result, you are free to utilize any supported NPM registry. Additionally, you may use someone else’s registration by their conditions of use.
Prerequisites
To proceed using NodeJs and NPM, you will need the following.
Hardware Specifications
- RAM 4GB
- CPU: Intel Core i3TM i3 HQ, 2.50 GHz,
- 256 GB of ROM.
- software prerequisites
Are you in Search of Developing Fast and Responsive Web Apps?
Contact us Today!How to Install NPM and Node.js on Windows?
First, you need to install Node.Js on your Windows machine because we have chosen to build an application utilizing this technology.
This section will guide you through the installation process with clear step-by-step instructions. So let’s begin with the first action right away.
Step 1: Download the Installer first.
Visit the official NodeJs website to get the Windows Installer. Ensure that you have the most recent download NodeJs. The NPM package administrator is part of it.
We are selecting the 64-bit Node.js installer in this instance.
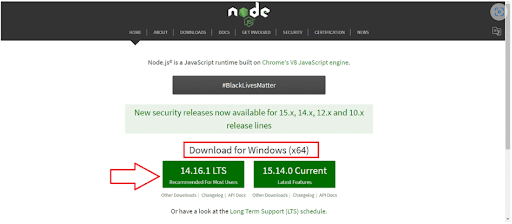
You are strongly encouraged to use the LTS (Long-term Support) version. Install the installer package by double-clicking it after downloading it.
Now your browser will download a msi file. Select the appropriate location for it.
Step 2: Install NPM and Node.js
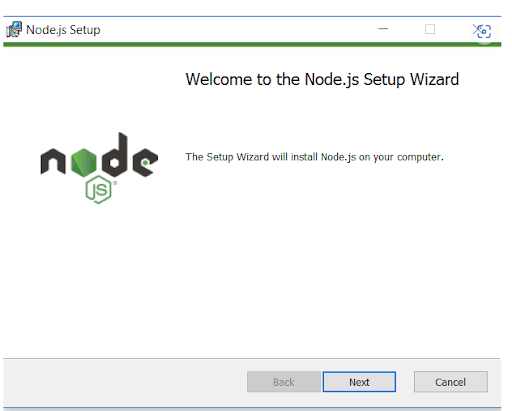
Double-click the .msi binary files to start the installation procedure after selecting the installation directory. Then provide permission for the application to run.
You should click the “Next” button after seeing a greeting on your screen. The setup procedure will begin.
- Select the location where you wish to install Node.js.
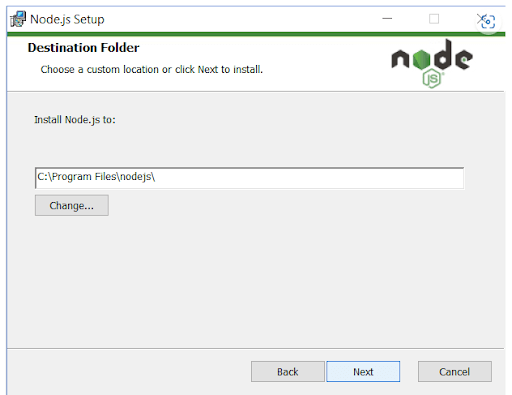
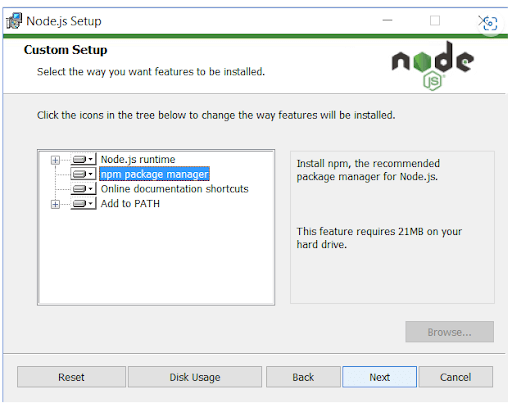
You can set up a custom page on the screen by selecting the Next button. Select the npm package manager rather than the
Node.js runtime as default. We can install NPM and Node together in this manner.
To install Node.js and npm in Windows and Mac features, you should have 143MB of free space.
The following functionalities will come pre-installed:
- Runtime for Node.js
- Npm package manager
- Shortcuts for online documentation
- Place on Path
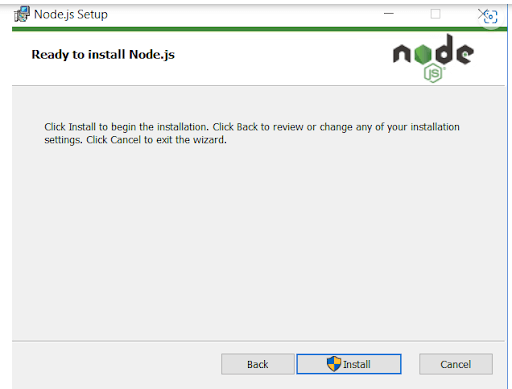
To set up Node and NPM, the setup is prepared. Let’s press the Install button firmly!
Step 3: Verify the versions of Node.js and NPM
If you are unsure whether you installed anything correctly, use “Command Prompt” to check.
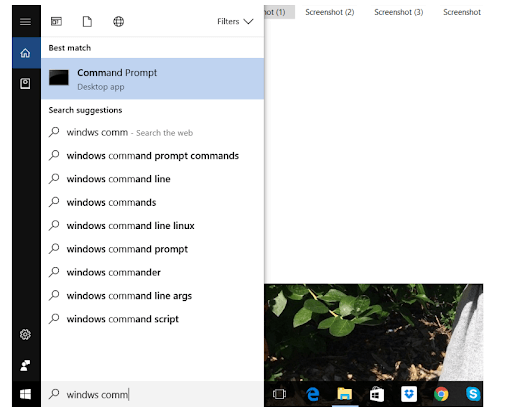
- On the screen, a Command Prompt window shall open.
- Type the Node -v command to verify Node installation.
- Type the npm -v command to verify NPM installation.
You shouldn’t be concerned if the figures you see change from mine because Node and NPM are frequently updated.

Install Node.JS and NPM easily on your Windows and Mac Now!
Hire our developers!What are the Steps to Install NPM and Node.js on a Mac?
If you are running macOS, let’s examine the installation procedure for Node.js and NPM.
Using the.pkg Installer, install Node.js
Well, the procedure is comparable to Windows. Here, Node offers a Mac.pkg installer. As a further option, we may download it from its official website.
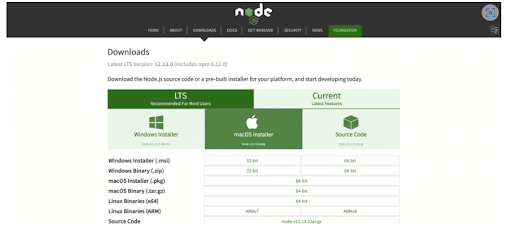
Step 1: First, get the. pkg Installer.
To download the .pkg installer, select “macOS Installer” from the menu. Make sure to download it to the area you want.
Step 2: Run Node.js Installer in step two.
Your Installer is now prepared to launch. You won’t need much time for it, though. So let’s dive into more knowledge now.

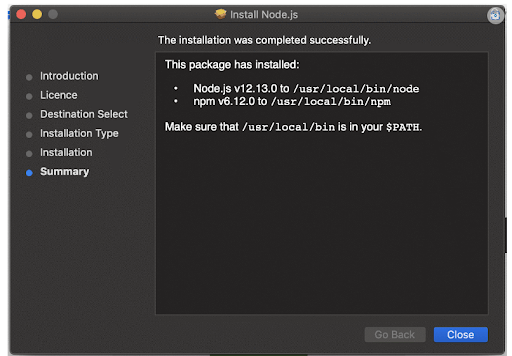
Step 3: Verify Node.js Installation
Execute the command that follows in your terminal to see if Node.js has been correctly installed on your Mac:

Step 4: Improve the NPM Version
It is not automatic for Node.js to update the npm version.
You can upgrade your npm version by writing the specified command.
![]()
Setting Node Home in Environment Variable
Run the command above in your terminal on a Linux or Mac system now. Doing this will make you confident that the PATH variable has the NODE path set.
Exporting the PATH variable as /usr/local/git/bin:/usr/local/bin:$PATH
Node’s default installation location is: */usr/local/bin*.
It’s best to include this command in your.zshrc or.bash_profile file. To ensure that these path exports remain on your system and that no one can identify them among all the terminal instances, it depends on the shell you are using.
Let’s execute the provided command to permanently add the information to the.bash_profile file.
echo ‘export PATH=/usr/local/bin:$PATH’ >>~/.bash_profile
Execute the provided function to make it accessible to all system users.
source ~/.bashrc
What are the Steps to Install Home using Nodebrew?
Homebrew is a package management system that is open-source and free. It simplifies the process of installing software on Linux and macOS. It adds files and packages to /usr/local in the appropriate directories.
Here, we may install Node.js via Homebrew. Let’s go on to the following phase after this installation.
Step 1: Install NPM and Node.js
Using Homebrew, Node.js, and NPM are incredibly simple to install. You can download, unpack, and run Node and NPM on your smartphone.
Start your terminal and type the given command.
brew install mode
After downloading of few files, install them.
Step 2: Verifying Node.js and Installing NPM
Similar to the Windows operating system, all you have to do to run the command is type it into your terminal.
For Node: node -v
For NPM: npm -v
If you have installed Node and NPM, Homebrew will update those versions. Ensure that the Node package in your Homebrew is up to date.
If not, execute the provided code to modify the Homebrew.
brew update
Execute the coder and update the version of the Node:
brew upgrade node
This will update the Node and NPM with their latest versions.
What are the Ways of Installing Node using NVM – Node Version Manager?
As a skilled Node.js developer, I frequently receive requests from people requesting me to install different Node.js versions on their hardware. Utilizing NVM, or Node Version Manager, is indeed achievable.
Step 1: Let’s install Node by following the instructions.
Download NVM using Install Script
There are now two ways to install NVM.
Using cURL:

Using wget:

After this, the user will be able to download NVM and install it.
Step 2 Verify NVM Installation
Utilize the following command to check NVM:
![]()
The code will display something like this:
![]()
In fact, it’s best to include this command in your.zshrc or.bash_profile file. To ensure that these path exports remain on your system and that no one can identify them among all the terminal instances, it depends on the shell you are using.
Let’s execute the provided command to permanently add the information to the.bash_profile file.
![]()
Execute the command and make it feasible to every user on the system.
![]()
Step 3: Installing the Latest Node Version Using NVM
Executing the code and installing the updated version of Node.js
![]()
Additionally, if you wish to install a certain Node version, you can choose from all the versions that are offered.
Run the following command now:

Let’s examine the installation of several Node.JS architecture versions now, as well as the specific versions that the command uses.

Additionally, use the following command to confirm the current version:

In line with the commands above, it will display “12.15.0”.
You can now continue creating the Node application as your Node installation is complete.
Important Considerations
- Using the.msi installer from Node’s official website, you can install Node.js on a Windows computer.
- Using the .pkg installer from Node’s official website, you may set up Node.js on your macOS device.
- Additionally, we can install Node on macOS by utilizing the Homebrew package manager.
- NVM provides a simple method for installing and maintaining many Node versions on the same machine.
Looking to Hire developers to Build Mobile Apps?
Get in touch with us today!Conclusion
Due to its applicability in both frontend and backend, Node.js has swiftly gained popularity as a programming language. A large community of active users is in place to prevent new developers and their queries from being overlooked.
Fundamentally speaking, Node.js is simple to learn and has tremendous capabilities for building complex apps. You might quickly become a full-stack developer with its assistance. Node.js is a natural choice for next-generation programming because of these qualities. If you are in search of developing responsive mobile apps you can hire developers from Concetto Labs which is a leading NodeJs development company.




 Indonesia
 Botswana
 USA
USA
 Italy
Italy
 Panama


 USA
USA UK
UK Saudi Arabia
 Norway
 India
India Australia